# Build photos
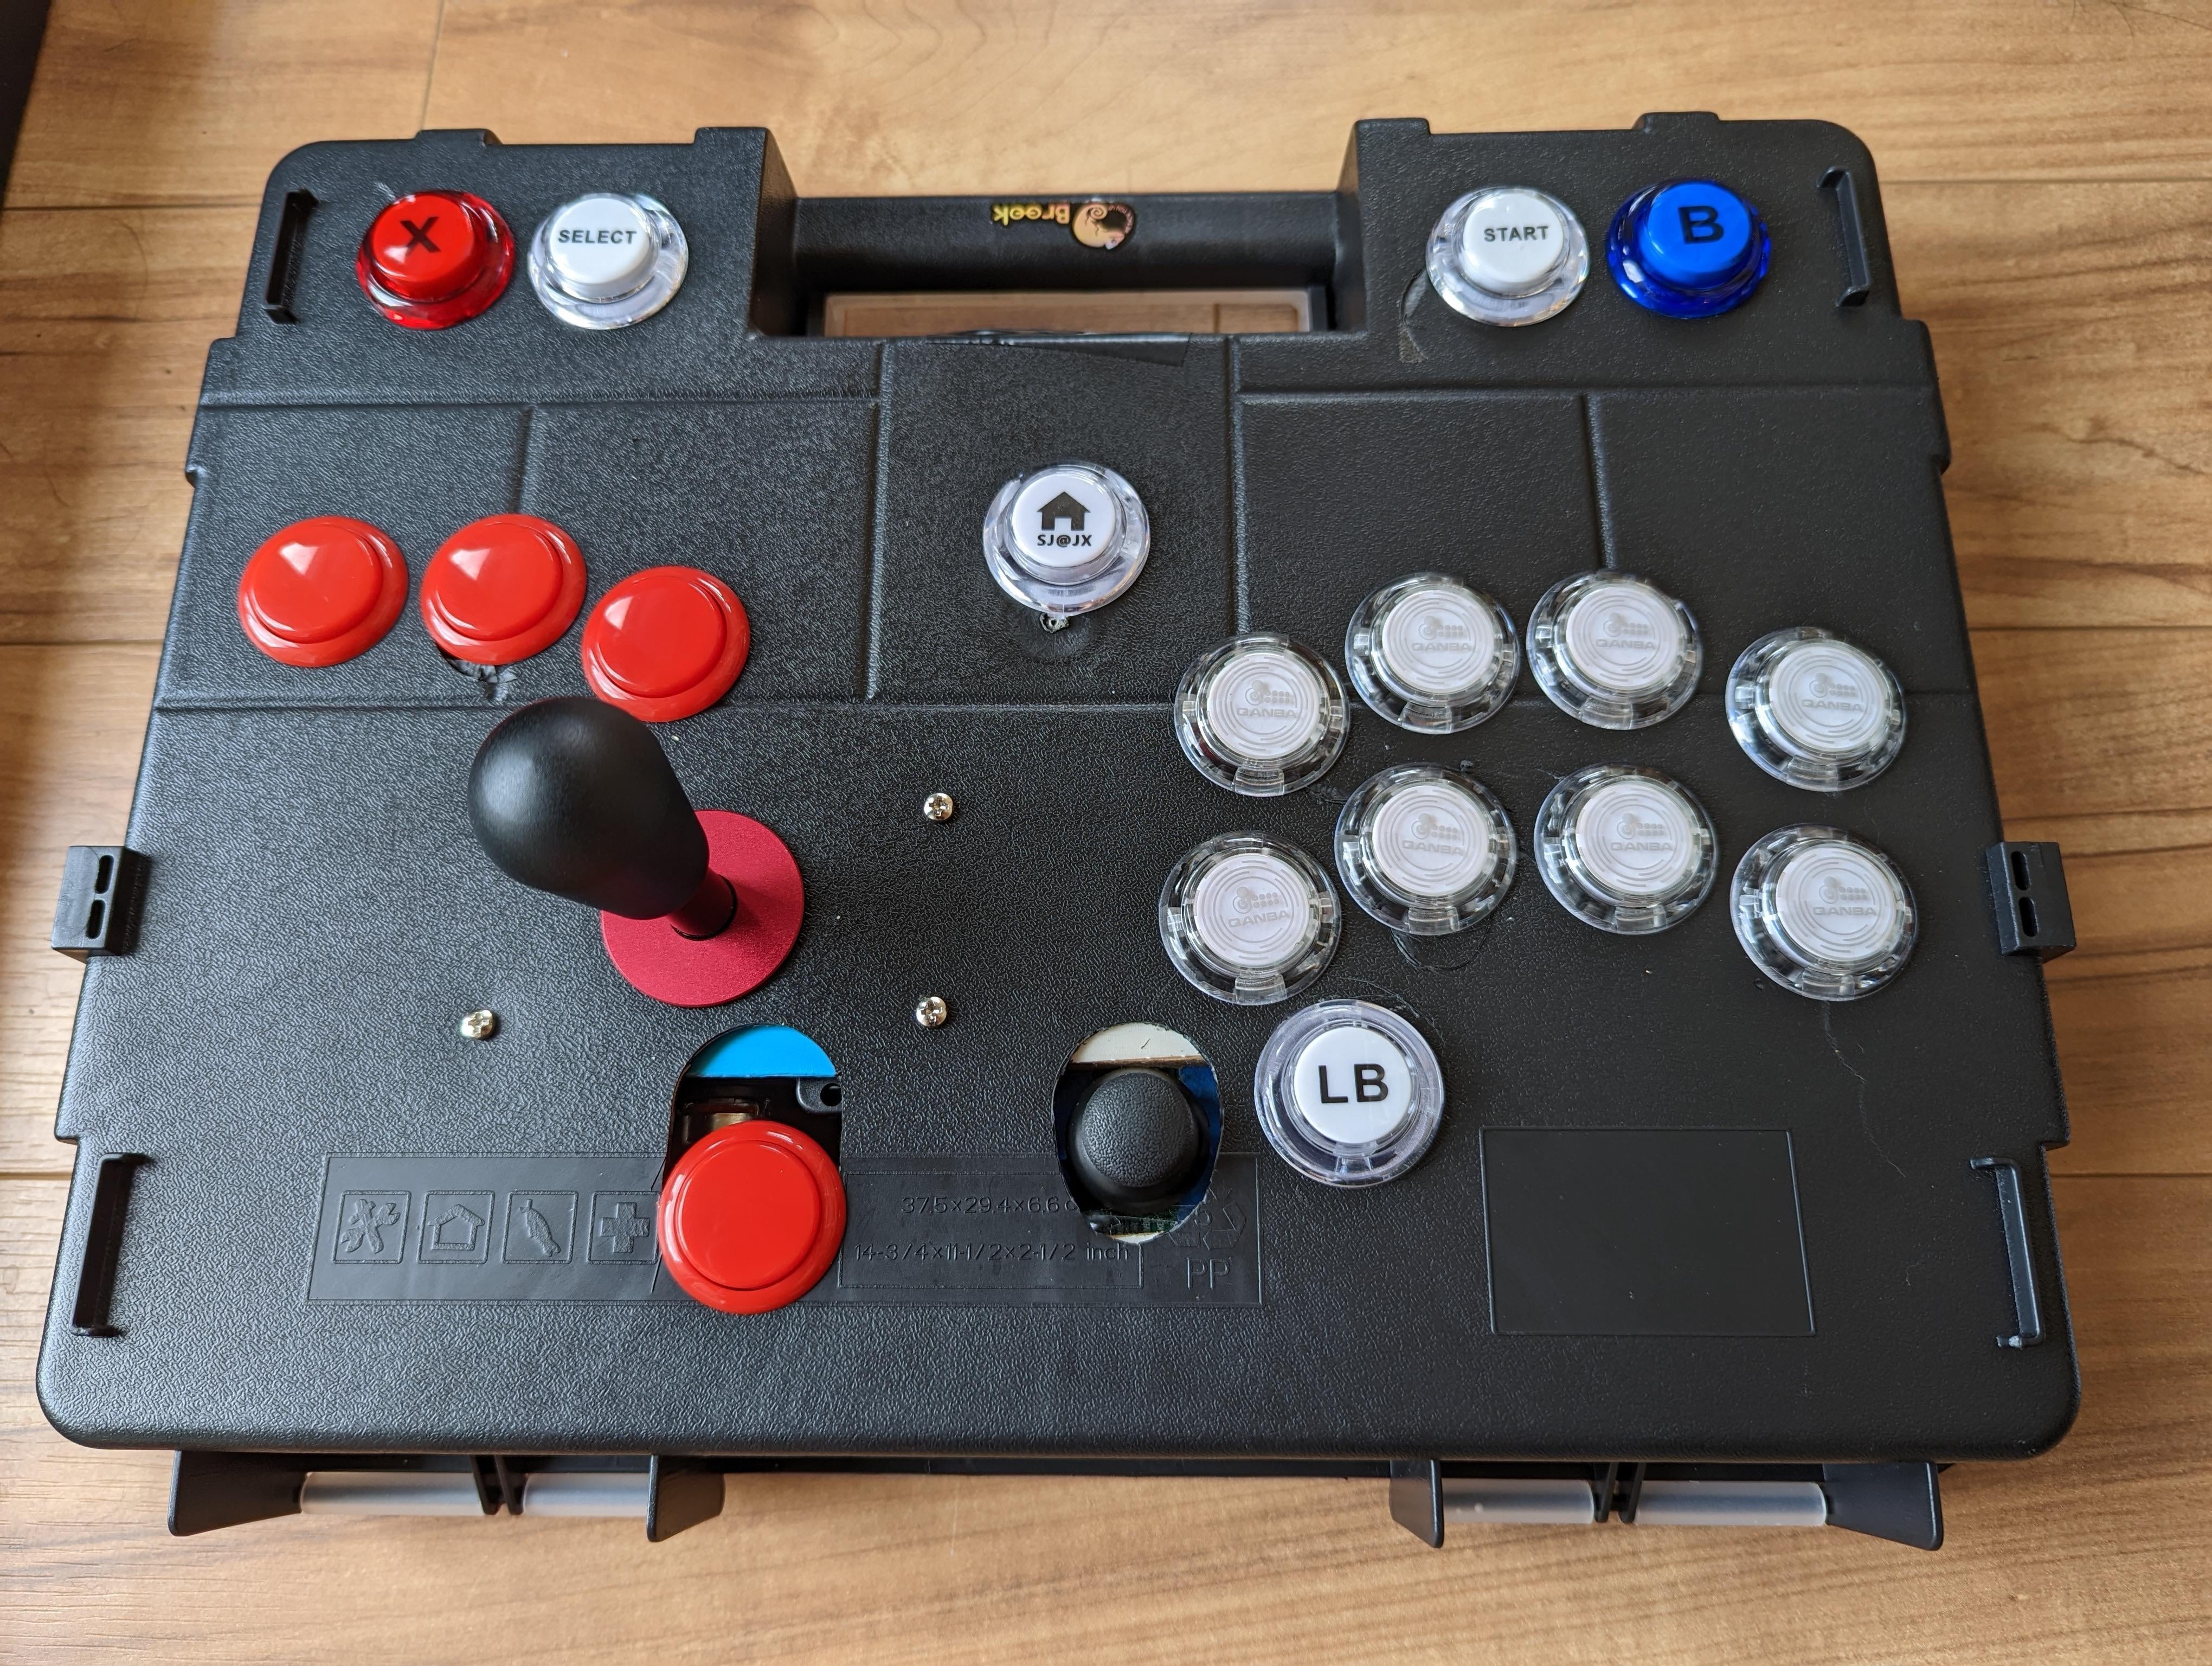
– [Here’s the top of the arcade stick](https://preview.redd.it/9dymdi6vbxh91.jpg?width=4080&format=pjpg&auto=webp&s=ed3f69978561397f4a1cabd2b20b2cbad6ef689a). I wanted to build a dual analog arcade stick that could be used for single-player games as a replacement for a standard controller.
– [Here’s the top without the bat-top](https://preview.redd.it/361ink6vbxh91.jpg?width=4080&format=pjpg&auto=webp&s=175a7f95f7c09c05f59543e601bb72b64ede2daa). The hitbox layout buttons are D-pad inputs to go along with the left lever being the left “thumbstick” and the right thumbstick being itself.
– [Closeup of the octagonal gate](https://preview.redd.it/11e44s6vbxh91.png?width=1080&format=png&auto=webp&s=39a50120f6ce9789d2c1337dd18a44537274efbc) cut for the main lever
– [Photo of the internals](https://preview.redd.it/zs49rm6vbxh91.jpg?width=4080&format=pjpg&auto=webp&s=bc200560fc14789f9901e5ddafb7c74db74052bc)… forgive my wiring mess. I tried to organize where I could, but it’s hard when the wires are all pre-cut for different lengths.
– [Photo of the back closed up](https://preview.redd.it/82ujpo6vbxh91.jpg?width=4080&format=pjpg&auto=webp&s=d51f64f26c69804ba519e57d18ba8dd1c3007d0b)
– Wiring diagram for analog buttons along with thumbstick and lever. Detailed write-up in comments.
# Digital to analog comparisons
– Hades
– Elden Ring
– Super Smash Bros Ultimate
# My initial impressions
I haven’t had a whole lot of time to play with my build, but the time that I have had has been fun. I’m glad that I built it! I can tell it will work great for single-player games after getting over the learning curve of the layout.
For Smash, I generally like it. It is pretty much what I was looking for. The main thing that I wish I could change is that the “throw distance” for the lever (how far the lever moves along its radius) is pretty wide. It certainly works and will probably feel fine after I get totally used to it, but getting “smash” inputs requires actually smashing the lever into the gate. I think this is worth it to get full control in Smash by having the analog inputs to finely control walking and tilt attacks without needing a modifier key
# Build details
– PCB = Brook PS4+ Audio w/ UFB-UP5 upgrade
– *IMPORTANT NOTE*: Even with the UP5 upgrade, this dual analog arcade stick cannot be used to play non-fighting-game PS5 games without workarounds at this time, such as using *remote-play* (see Elden Ring comparison video)
– Left Stick/Lever = SJ@JX analog lever
– Hitbox buttons = Dpad. I used spare generic buttons from my 8bitdo wireless arcade stick
– Right stick = SJ@JX analog thumbstick
– This comes in the kit with the analog lever
– Note: The “R3” functionality does not seem to work and may need a dedicated button
– Action buttons = spare buttons from my Qanba Crystal
– Auxillary buttons = buttons from the SJ@JX kit, manually wired with Dupont jumper wires
– (Not on this build) Cross-up buttons = Blue Tip Gaming analog buttons, available at PAS
# Wiring notes
Some quick notes for anyone searching for more info about wiring up the SJ@JX analog lever (and thumbstick)
– You will need an analog compatible board, like the Brook wireless or PS4+ Audio boards
– See post pictures for [wiring diagram](https://preview.redd.it/lea9ih6vbxh91.png?width=1468&format=png&auto=webp&s=047afd39615e9d3c4184eff02d3a2d0a7759cce8)
– The diagram shows how to wire up the most complicated scenario of using (1) an analog left lever, (2) an analog thumbstick for the right stick, and (3) 4x analog buttons *also for* the right thumbstick
– If you do not want to use (2) or (3), simply don’t complete wiring them in. Wires do need to be connected on the Brook board, however, or the inputs for the main lever won’t be read properly for some reason
– The quick connect harnesses that come with the SJ@JX kit DO NOT match the Brook pin map.
– You DO NOT need to be able to solder to build this.
– You can connect the lever and thumbstick to the Brook board by using [Dupont/Jumper wires](https://m.media-amazon.com/images/S/aplus-media-library-service-media/2fa083f4-4fd0-4444-abc4-5ebde070c3da.__CR0,0,970,600_PT0_SX970_V1___.jpg). A pack of 120 cables is only $8ish on Amazon, and you won’t need that many.
– You will need some way to marry multiple wires together. I used [wire nuts](https://m.media-amazon.com/images/I/81LvXuilEZL._AC_SL1500_.jpg)
– To use either analog, you seem to need to have something connected to L-X axis, L-Y axis, R-X axis, R-Y axis on the board, otherwise you’ll get weird readings (L3 and R3 don’t need to be hooked up)
– I’m not sure if the requirement is that two analog sticks (like a lever + a thumb stick) must be fully wired up, or if it just requires that wires are connected to the board’s pins
– Removing the jumper to utilize the analog sticks (J14 at the bottom right of the brook board) disables the L3/R3 buttons in the [PS pad, L3, R3] pin cluster. You need to use the L3/R3 from the analog pin cluster.
– The SJ@JX lever has a 2 wire harness and a 4 wire harness. The 2 wire harness can be ignored and left disconnected from anything. The 4 pin is all we need.
– For the lever, with the pots oriented towards the bottom of the case and towards your action buttons, the wiring order is: (For more details, check the wiring diagram in the post photos)
– Yellow = VCC
– Red = X axis
– White = Y axis
– Black = Ground
– For the SJ@JX thumbstick, the pins are labeled on the board
– There is a pin labeled “*12*”. This pin doesn’t need to be connected to anything. I don’t know what this pin does.
– The “Key” pin doesn’t seem to work, so you will need a separate button for R3 if you want that.
– If you choose to use the SJ@JX buttons, you can wire the buttons by using female Dupont quick connect heads.
– Ground = center pin
– Signal = the pin on the `-` side