Materials:
– 3 sheets white 8.5”x11” cardstock
– 1 sheet pink paper
– 1 sheet black paper
– 1 hot pink alcohol marker
– Ruler/Measuring Tape
– Scissors/Xacto Knife
– Glue Stick
– Pen/Pencil
Steps:
1. Fold one sheet of cardstock in half “hamburger style” (each half should be 8.5” x 5.5”)
2. Orient your cardstock like a card. Using your pink marker, make a horizontal line marking 4 inches from the top of the card.
3. Color everything above the line with the marker. Be sure to let it dry and do a second pass if necessary for even color. Set aside.
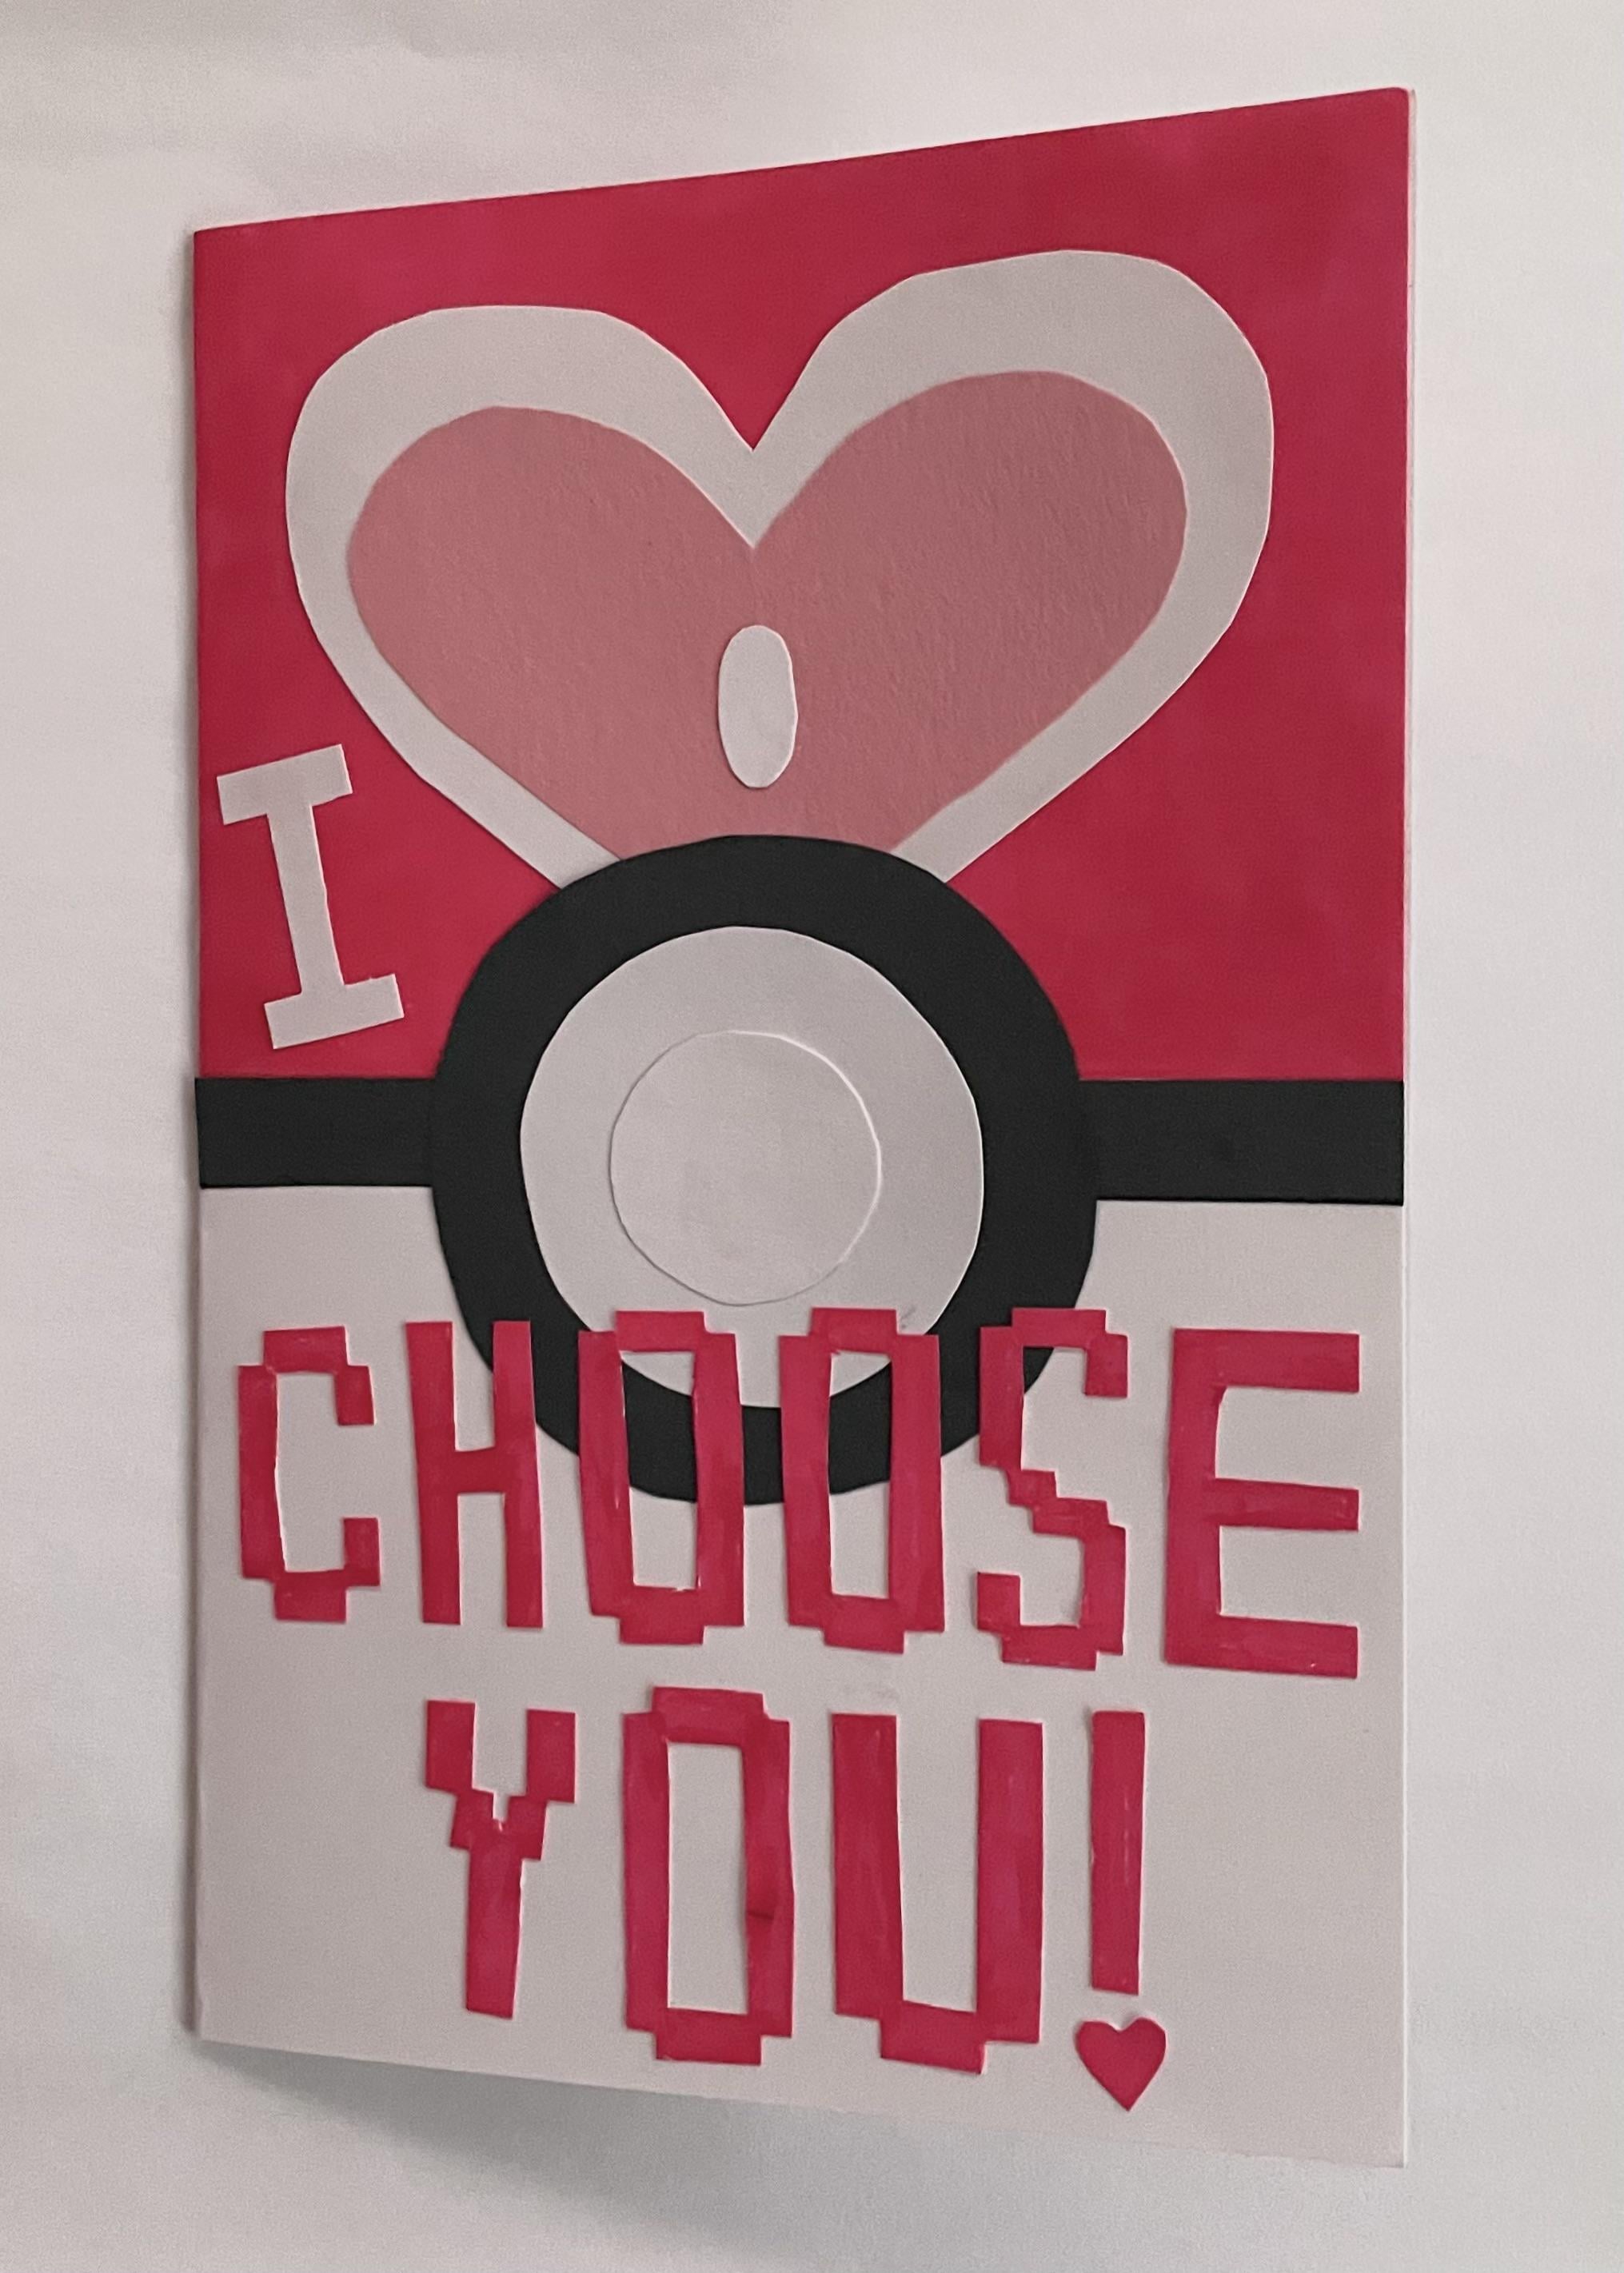
White Heart:
4. On the second piece of cardstock, measure, mark, and cut out a 3” x 5” rectangle.
5. Orient the rectangle so the 5” sides are on the top and bottom. Measure and mark 2.5” from the left along the top edge.
Important note: For cleaner results, be sure to keep your pen marks on the same side of the paper.
6. Measure and mark 1.75” and 3.25” from the left along the top edge.
7. Measure and mark 1.25” down from the top edge on both sides.
8. Measure and mark 1.5” and 3.5” from the left along the bottom edge.
9. You now have marked all the places in which the heart touches the edge of the rectangle, as well as the vertical midline. Sketch the heart and cut it out; Take your time and use a reference as a guide.
Pink Heart:
10. On the pink paper, measure, mark, and cut out a 2.5” x 4.25” rectangle.
11. Orient the rectangle so the 4.25” sides are on the top and bottom. Measure and mark 2 1/8” from the left along the top edge.
12. Measure and mark 1 1/8” and 3 1/8” from the left along the top and bottom edges.
13. Measure and mark 1.25” down from the top edge on both sides.
14. You now have marked all the places in which the heart touches the edge of the rectangle, as well as the vertical midline. Sketch the heart and cut it out, then set aside.
Pokeball Seal:
15. On the black paper, measure, mark, and cut out a 0.5” x 5.5” rectangle. Set aside.
Pokeball Mechanism:
16. On the black paper, cut out a 3” square.
17. Measure and mark 1.5” from the left on each side.
18. You have now marked all the places in which the circle touches the edge of the square. Carefully sketch it, cut it out, and set aside.
19. On the second piece of cardstock, measure, mark, and cut out a 2.25” square.
20. Measure and mark 1 1/8” from the left on each side.
21. You have now marked all the places in which the circle touches the edge of the square. Carefully sketch it, cut it out, and set aside.
22. On the second piece of cardstock, measure, mark, and cut out a 1.25” square.
23. Measure and mark 5/8” from the left on each side.
24. You have now marked all the places in which the circle touches the edge of the square. Carefully sketch it, cut it out, and set aside.
Heart Detail:
25. On the second piece of cardstock, measure, mark, and cut out a 7/8” x 3/8” rectangle.
26. Orient the rectangle so the 3/8” sides are on the top and bottom. Measure and mark 3/16” from the left on the top and bottom edge.
27. Measure and mark 7/16” down on both sides.
28. You have now marked all the places in which the oval touches the edge of the rectangle. Carefully sketch it and cut it out, using a reference as a guide.
Lettering:
29. On the second piece of cardstock, begin writing your letters using your pink marker. As a general guideline, the letters in “Choose” should be about 5/8”wide x 1.5” tall, and the letters in “You” 3/4” x 1 5/8” tall.
30. Cut out your letters and fill in any white spaces with your marker for a cleaner look.
31. On the second piece of cardstock, cut out the letter “i” (uppercase) the same size as the letters in “choose”. This will be your only white letter.
Assembly:
32. Using a reference as a guide, glue the pink heart to the white heart.
33. Glue the black rectangle to your card right below the hot pink line.
34. Line up both the black circle and heart, then glue.
35. Line up and glue both white circles, then the oval on the heart.
36. Arrange then glue your letters.
37. Fold the third piece of cardstock in half in the same manner as your card.
38. On the inside of your folded cardstock, write your message and decorate as wanted.
39. Glue the shell of your card to the message, paying attention to edges and orientation.
40. Watch your recipient’s face light up on Valentine’s Day.
This took me about 3 hours to complete, but would likely move faster with proper tools and workspace. Happy crafting yall.
by Far_Comfortable7446
2 Comments
Ok this is fucking adorable
This is very creative! Excellent work!